Setting up a new project
Now that you're hooked, here are two ways to set up a new sandbox and start experiencing SHAFT:
Option 1: Interactive Project Generator (Recommended)
The easiest and most interactive way to create a new SHAFT project is using our Project Generator. This tool guides you through the project setup with a user-friendly interface.
The generator will help you:
- Choose your project type and testing framework
- Select dependencies and features
- Configure your project settings
- Generate a ready-to-use project structure
If the generator doesn't load above, you can open it in a new tab.
Option 2: Maven Archetype
You can also set up a new SHAFT project using our TestNG Maven Archetype.
-
You can do that by following this lovely IntelliJ IDEA guide.
- Before you press
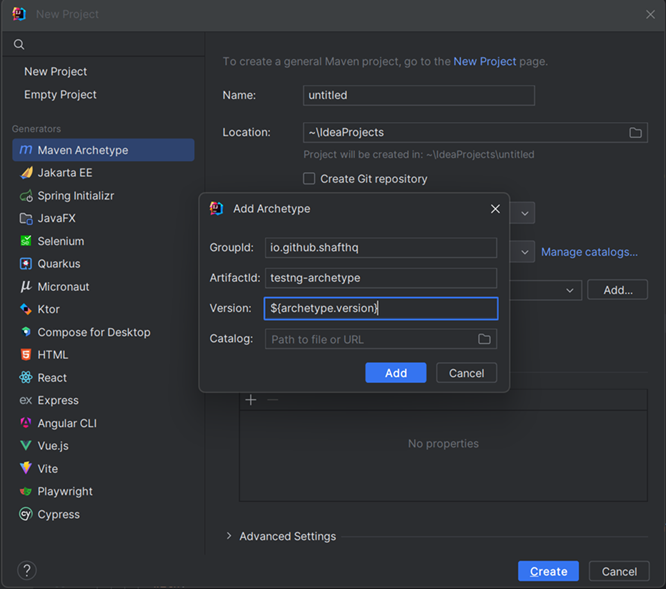
Createyou'll need to add the archetype first by using this data
GroupId: io.github.shafthq
ArtifactId: testng-archetype
Version: ${archetype.version}Replace${archetype.version}with the latest SHAFT_Engine: TestNG Archetype version.- It should look something like this

- Before you press
-
Or you can do it manually by following these steps:
- Download the latest version of mvn
- Add it to your PATH variable
- Create a new directory for the project, and navigate to it.
- Open a Terminal window in the target directory and execute the below command.
Generate a new SHAFT projectmvn archetype:generate "-DarchetypeGroupId=io.github.shafthq" "-DarchetypeArtifactId=testng-archetype" "-DarchetypeVersion=${archetype.version}" "-DinteractiveMode=false" "-DgroupId=io.github.shafthq" "-DartifactId=using_SHAFT_Engine"
${archetype.version} with the latest SHAFT_Engine: TestNG Archetype version.
"-DgroupId=io.github.shafthq" and "-DartifactId=using_SHAFT_Engine" with the groupId and artifactId that you want to use for the new project.